Each post in this series builds on information discussed in previous posts. See the Photography for Beginners page on the menu for links to all the posts.
In this post we will cover camera features related to exposure and metering.
Dynamic Range
Before getting into camera features it’s a good idea to become familiar with this term. Ignoring all the technical jargon, dynamic range is essentially the amount of difference between the darkest and brightest parts of a scene.
A high dynamic range scene is one with lots of contrast between bright and dark areas, like a sunset or a canyon landscape with one wall in deep shadow and the other in bright sunlight. An example of a low contrast, small dynamic range scene is a fog-filled forest.
Cameras are limited when compared to the human eye when it comes to dynamic range. If you are looking at a high contrast scene your eyes are still able to pick out most details in the shadows and bright spots. But cameras are not always able to record everything your eyes see in a single photo. With a high dynamic range scene it can be a challenge to get a nicely balanced exposure.
When your camera loses detail in bright or dark areas it’s called “clipping.” The details aren’t captured by the camera’s sensor, and are thus clipped out of the resulting photo. You’ll also see references to “blowing out highlights,” meaning details are gone from overly bright areas. This is especially common when the sky is very bright compared to the main subject of your photo, or if there is a white object in the frame like a white flower.
Not all cameras are equal in capturing dynamic range. As a general rule of thumb, the larger the sensor is and the more expensive a camera is, the more dynamic range it can handle.
If you post-process photos in editing software you can often recover some details that initially look to be lost. But this is mostly true for images shot in RAW, which saves all the data your sensor captures. Most beginners shoot in jpeg, which severely limits what you can accomplish in editing. Even if you shoot RAW, it’s still best to get things right in-camera while shooting as much as possible. (I will discuss RAW vs. jpeg in a future post.)
HDR Photography
HDR (high dynamic range) photography usually refers to a style of photo editing done on images that have a large dynamic range. Without post-processing the photo would either have very dark areas with little to no details visible, or terribly blown out bright areas.
The process flattens contrast and brings out details in both the bright and dark areas by layering images in editing software. You need to shoot in RAW if you want to do HDR processing. If you’re interested in the topic you can read more about it online.
Some cameras have a built-in HDR option. When it’s turned on your camera takes multiple photos with one press of the shutter button, each with a different exposure, and then automatically combines and processes them into a single jpeg image file.
I’ve never used this feature so I’m not sure how well it works, but I suspect a lot of the poorly done HDR photos you see online come from in-camera HDR. If your camera has the feature you can always play around with it to see what you think of the results.
The practical method for accomplishing the same thing in-camera without using multiple images is using graduated neutral density filters. I will be discussing filters in a future post.
Bracketing
Above I mentioned taking different exposures with one press of the shutter button. This is called bracketing and it isn’t specific to in-camera HDR. Bracketing is a separate camera feature and can be used any time you’re unsure about exposure or you want insurance for an important photo.
When bracketing is turned on the camera will take a photo with what its meter has determined to be the correct settings. But it also takes additional photos that are more exposed and less exposed, thus they bracket the “ideal” exposure on either side.
A basic camera usually takes three photos, and you can only adjust the exposure, by 1/3 stop increments, by up to two stops. Higher end cameras often offer your choice of 3, 5, or 7 photo brackets, and several stops of exposure.
You will need to read the manual for your camera to see how to activate bracketing (some use the menu and some use a button or dial), and to see what bracketing options are available.
I don’t use bracketing very often because in my experience the camera usually gets it mostly right with the primary exposure, so the bracket photos just get deleted. If you leave bracketing turned on most of the time in order to be cautious that’s a lot of extra photos to look through and delete. But in a challenging or iffy situation bracketing provides some peace of mind and sometimes one of the bracket photos is the best of the bunch.
EVF and Live View
Some point and shoot cameras and many ILCs (interchangeable lens cameras) have an optical viewfinder. This means it’s just glass; you can see to compose your image, but no camera data is displayed. Such cameras usually have a feature called Live View that displays a digitally generated view on the camera’s back screen.
Cameras that have an EVF (electronic viewfinder) automatically display Live View in the viewfinder.
The advantage of Live View is that it’s mostly WYSIWYG (what you see is what you get). This means you get a preview of what your current camera settings will produce before you take the photo. (There are some exceptions, but it’s true enough for this discussion.)
If you see ahead of time that the exposure isn’t going to be right you can choose to make adjustments to your camera settings before taking the photo. As you make adjustments those changes will update the Live View.
The disadvantage of Live View is that it sucks up battery power. If you have an EVF, it takes less power than the back screen so use it whenever possible. If you only have a back screen, only turn it on when needed if you’re in a situation where there’s a chance you will deplete the battery before you can recharge.
Blinkies
Many cameras offer a feature that photographers call “blinkies.” The exact terminology and implementation can be different on different cameras, but the thing in common is that when this feature is turned on, overexposed areas in the frame will blink or otherwise be indicated on your screen. The blinking indicates possible blown highlights.
If you’re lucky this feature works while composing your photo, so you have the option to make an adjustment prior to snapping the photo. On my current camera the feature only works when reviewing a photo I already took on the screen. So if I get the blinkies and decide I want to adjust the exposure to avoid blowout I have to take another photo.
Histogram
Many cameras offer the option to display a histogram in the viewfinder or on the back screen and this can help with getting a good exposure.
A histogram indicates how much light and dark there is and how evenly exposed a photo will be. If the bars are in a mountain shape with all the high points in the middle, it is a low contrast exposure. If the bars are a valley shape with high points at both ends and low in the middle it’s a high contrast exposure.
If most high bars are on the left it’s a low-key, or mostly dark scene. If on the right it’s a high-key or bright scene. You may run into people talking about “exposing to the right” and the histogram is what they are referring to.
The histogram can help you avoid clipping, over or under exposing, or not having enough contrast. But histograms aren’t foolproof, and you need to understand them in more depth than I can provide here to make good use of them. Read up on the subject if this is a tool that interests you.
Exposure Compensation
While the automatic exposure meters in digital cameras are very good they can’t always get it right, so most cameras offer exposure compensation. It’s a way to easily brighten or darken the exposure without having to fiddle with specific settings.
In some cameras you have to use the menu, some have a button that brings up the compensation scale for adjustment, and my Fuji has a dedicated dial on top that makes it quick and easy.
You might need to use exposure compensation at any time, but there are some situations in which you are almost guaranteed to need it. A couple examples are backlit subjects and snow. In both cases your camera’s meter is going to underexpose, and exposure compensation is often the easiest way to deal with it.
Metering Modes
Most digital cameras offer more than one automatic exposure metering mode. Not all cameras offer all the modes listed here, and a few may offer a mode not covered.
Selecting a mode is usually done in the camera’s menu system. The term used by most camera manufacturers is some variation of metering, but Fuji uses “photometry.”
Auto exposure metering works like autofocus. When you half-press the shutter button you are not only telling the lens to focus, you are also telling the camera to meter the light and determine the correct exposure settings.
Evaluative
This mode also goes by several other names such as matrix, zone, and multi. This is the default metering mode in most cameras and is your general purpose mode. You should keep your camera set to this metering mode until you have a specific situation in which a different mode will do a better job of producing the results you want.
In this mode the camera uses a complex algorithm to evaluate your entire composition and arrive at an exposure that accounts for variations in brightness. It will add priority weighting to wherever your AF (autofocus) point is set.
Spot Metering
This is just what it sounds like. The camera meters only one small spot and doesn’t worry about anything else in the frame. The metered spot is in the center of the frame unless you can select other AF points, in which case it usually uses the active AF point. This means that whatever you focus on should be properly exposed, but the rest of the frame may be very dark or overexposed.
This mode can come in handy if you want to dramatically enhance your subject when it’s brighter or darker than the background. It’s also extremely useful for bird photography because it’s very important to get white correctly metered on birds and because bright sky or dark foliage in the background can throw off the camera’s meter if you’re using an evaluative mode.
Partial Metering
This works like spot metering but uses a larger spot to meter with.
Center-Weighted
In this mode your camera still evaluates the whole composition to some extent, but it gives a large percentage of priority to the center of the frame. Unlike spot metering it doesn’t move with your AF point and remains in the center.
Center-weighted metering is useful for backlit subjects, though if your subject is small in the frame or off-center it’s best to use spot metering instead. If you’re shooting portraits or have a large subject in the center of your frame you might want to give this mode a try. This mode can also be helpful if there are very bright or very dark areas at the edges of your composition that you don’t want the camera’s meter to be distracted by.
Average
In this mode the camera simply averages the brightness and darkness of the entire frame to arrive at an exposure, rather than evaluating and weighting various parts of a composition.
I had to look up how this would be helpful because I’ve never used it or read anything about it. My camera manual says it’s good for maintaining a consistent exposure across multiple shots with the same lighting. So it might be good for some portraits and some landscapes. According to Wikipedia it could potentially avoid blown highlights.
Of all the modes listed here evaluative and spot metering are used most often by far. The majority of photographers rarely to never use the others.
Expose and Recompose
This is a trick you can use when you don’t want to fiddle with settings or changing metering mode, or the auto metering isn’t getting it quite right. It’s the same principle as focus and recompose, but for exposure. I used this as a quick and dirty solution with my pocket point and shoot camera quite a bit.
If Live View shows the exposure for the most important part of your composition is too bright or too dark, you can point the camera at another area around you to force the automatic meter adjust, half-press the shutter button to lock in the new exposure, reframe your composition, and snap the photo.
If you need the exposure to be brighter, point the center of your frame at a darker area. If you need the exposure to be darker, point at a brighter area. Sometimes you might need to do this more than once if the spot you pointed at didn’t lock in a good exposure.
Let’s say you’re taking a photo of a snow-capped mountain in sunlight, but there are dark evergreen trees in the foreground. The dark trees might throw off the meter so that the mountain becomes overexposed. If you tilt the camera and meter off the sky instead you’ll probably get the right exposure for the mountain.
You need to be aware of the potential drawback of doing this. Your exposure and autofocus are both locked when you half-press the shutter button. For a lot of photos this won’t matter. But depending on your aperture, where you meter from, and where your subject is, you could end up making your subject out of focus.
Many cameras have an AEL (auto exposure lock) button, which allows you to avoid the focus pitfall. When you meter on a different area you push and hold the AEL button to lock the exposure, but the camera won’t autofocus until you half-press the shutter button. Use the shutter button to acquire focus on your subject, then recompose and take the photo.
This method can be awkward because you are manipulating two different buttons at the same time to get the pic. But if you practice at it, it can become second nature instead of a distraction.
Another way to get around the focus drawback is to manually focus, and then your shutter button is only locking in exposure.
Examples
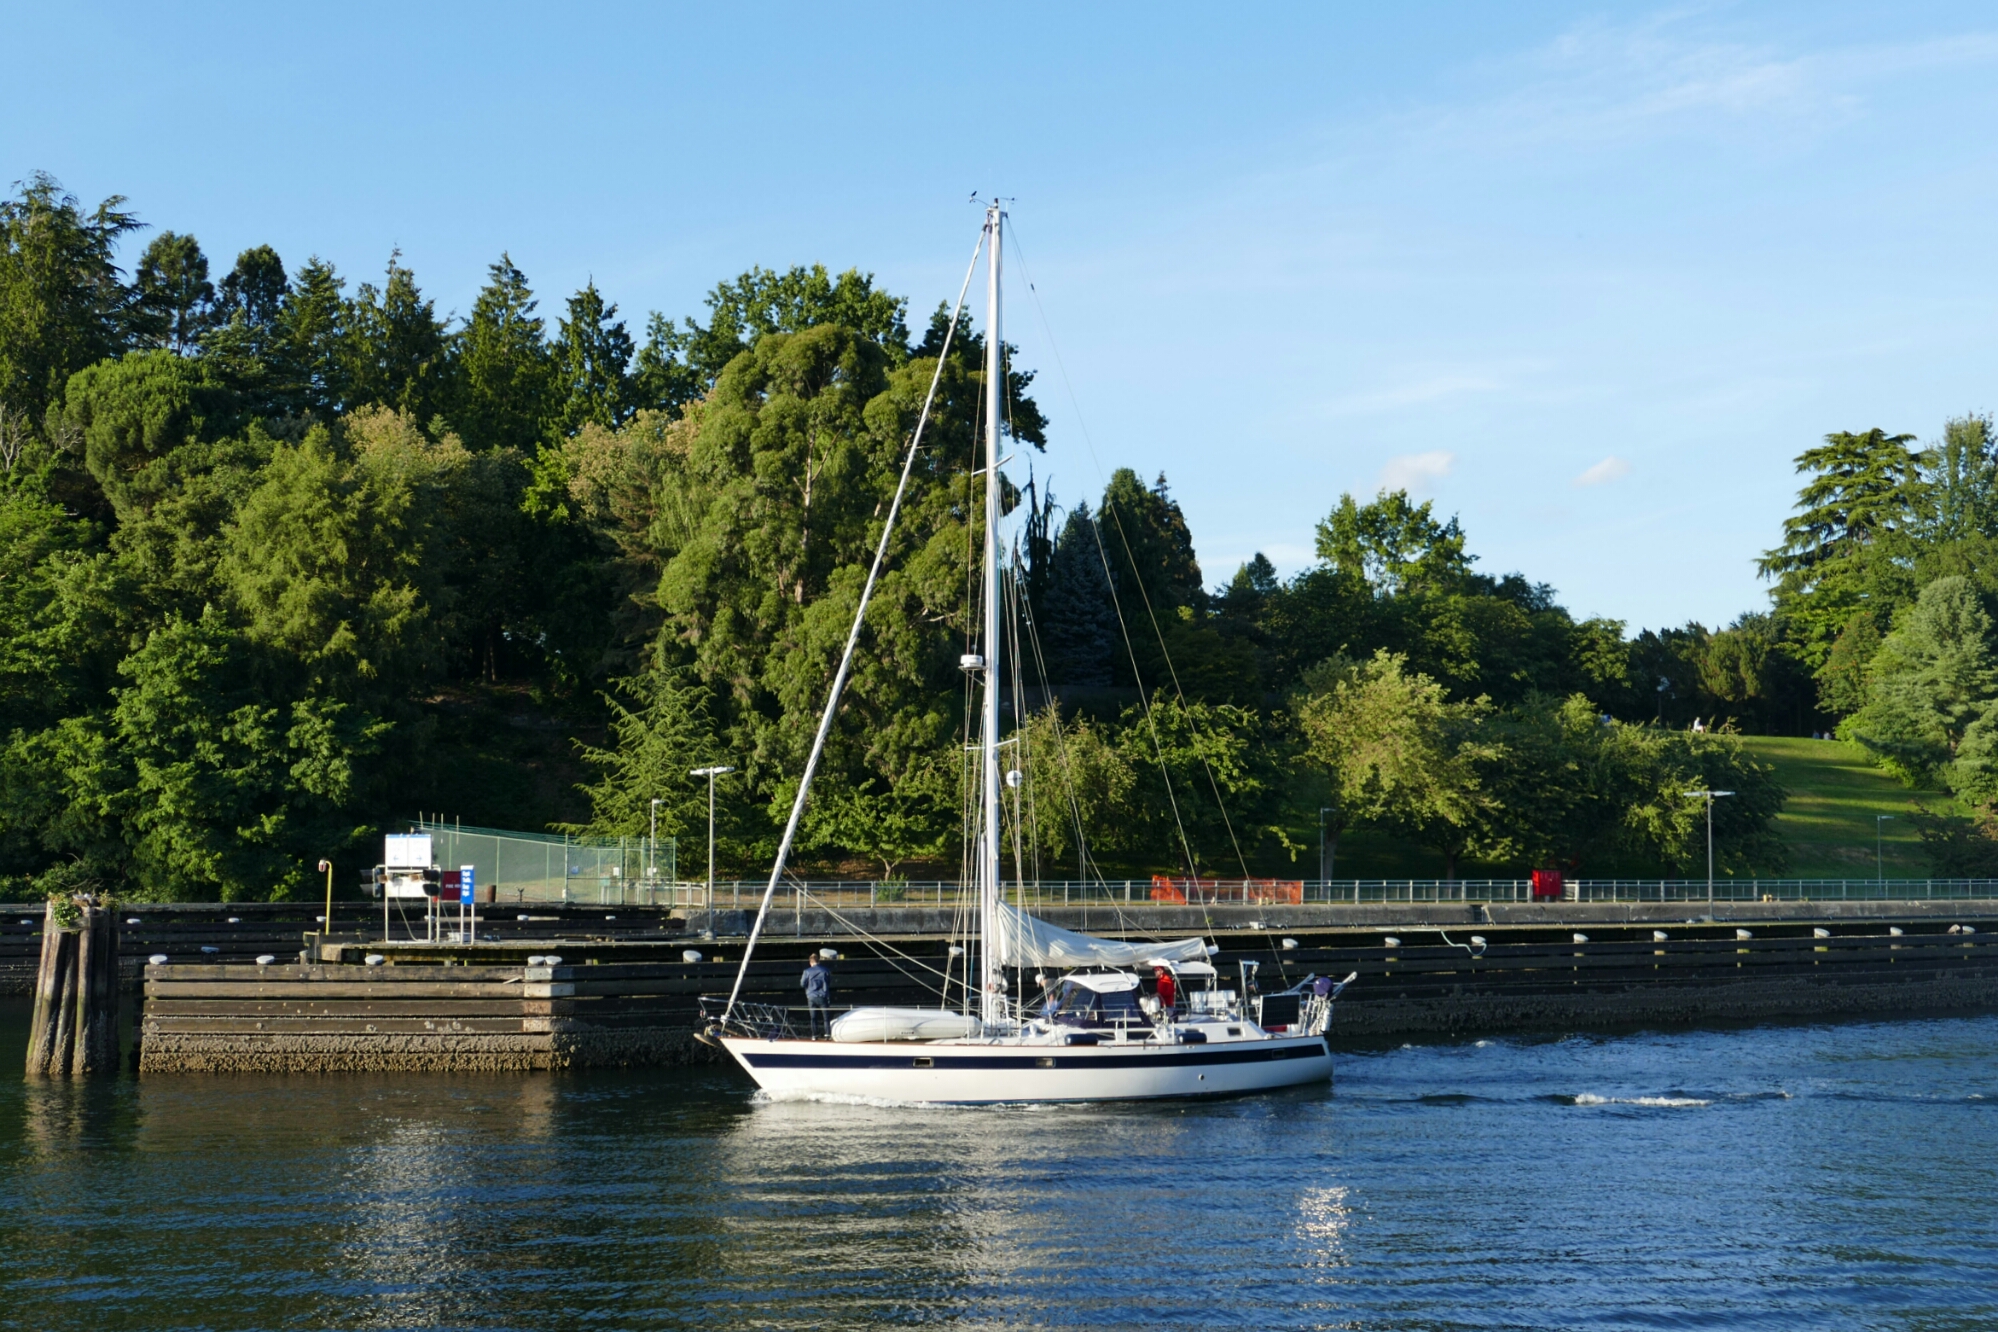
Photo #1 was shot using the general purpose evaluative metering mode. The camera’s meter did a good job of balancing the exposure in a scene with both bright and dark areas.
Photos #2 and #3 were shot using spot metering. You can see that the subjects are both correctly exposed, but the backgrounds are unnaturally dark because the meter didn’t take those areas into account. That’s not inherently good or bad, it just depends on your intent as to whether spot metering is appropriate or not. In the case of the plants on the post I liked the effect and in the case of the heron I only cared about the bird.


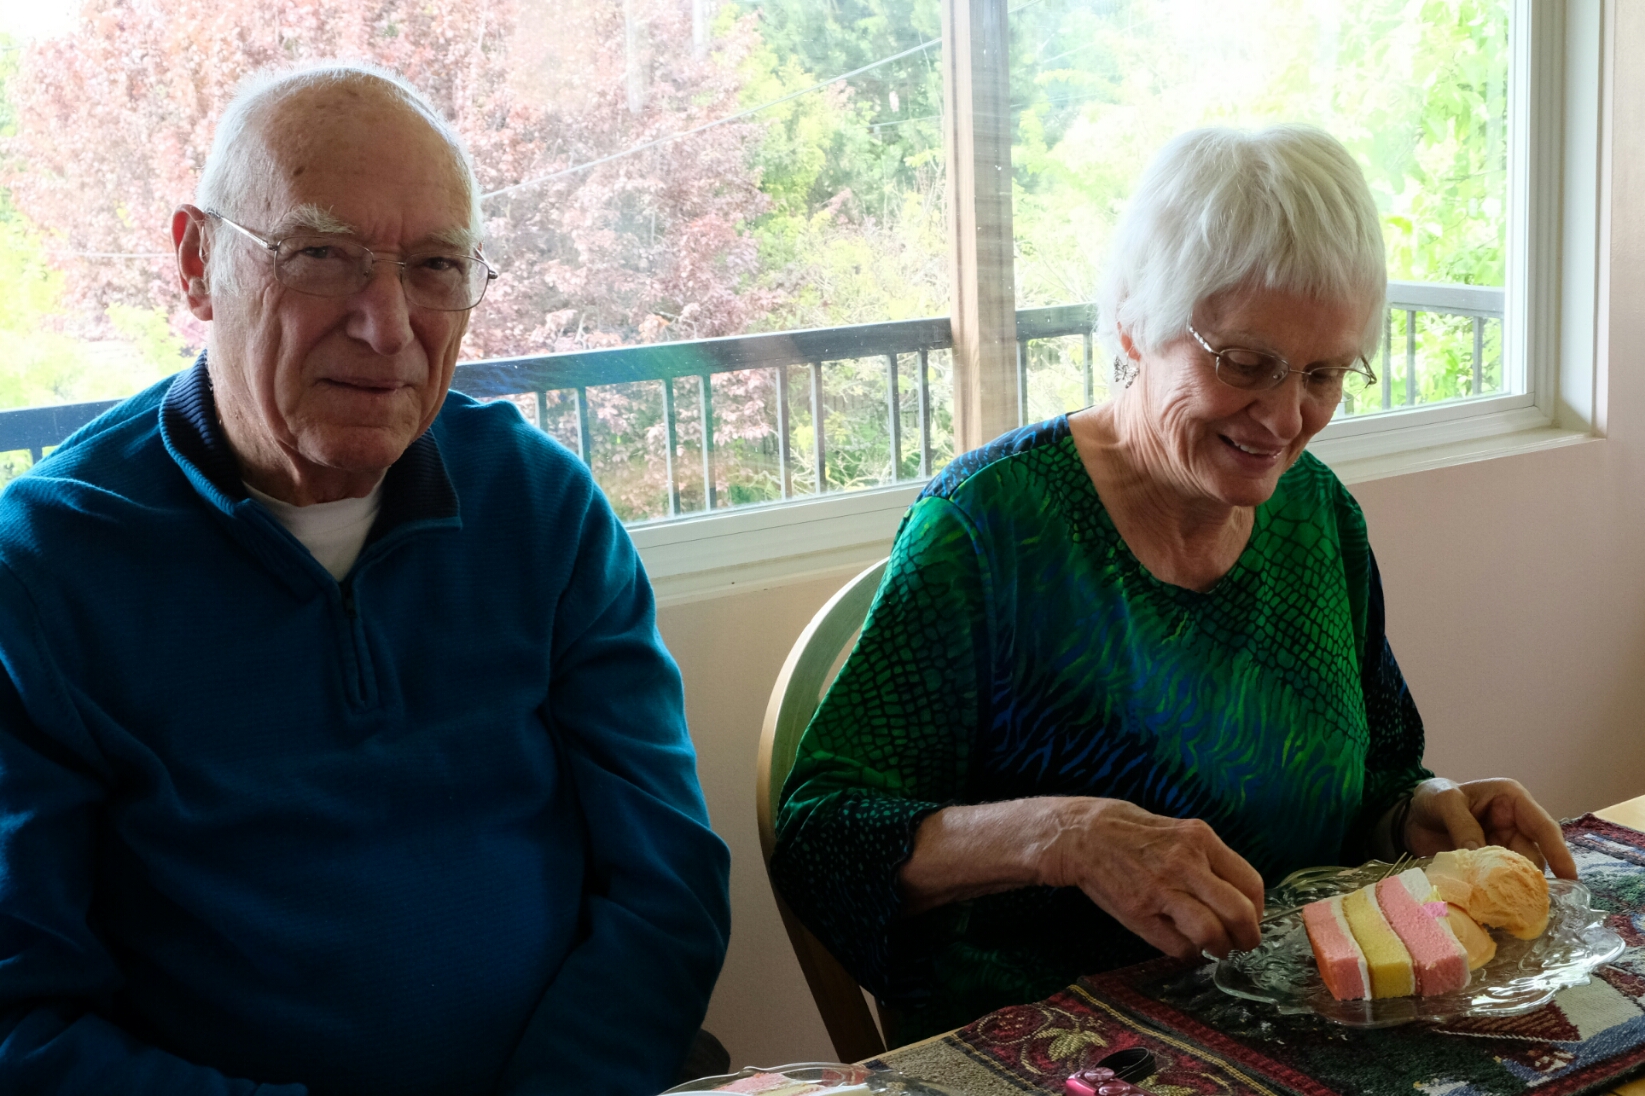
Photo #4 shows a common situation, people backlit because of a window behind them. If you don’t want to use flash to fill in you have to do something else to balance the exposure or the people’s faces will be much too dark. In this instance I bumped up exposure compensation by one stop because the dedicated dial on my camera makes it the easiest solution. It’s not a perfect exposure, but passable for a quickly taken family snapshot in poor light.

Thanks for these tips – will try to use and see what I think 🙂 – always up for learning anything!!! Thank you! Happy Monday!
LikeLike
I’m still learning and trying new things all the time too. Those spot meter pics were the first I ever took using that mode.
LikeLiked by 1 person
Well thanks for sharing it! I am always wanted to learn anything I can to try to improve, etc. so I really appreciate it!
LikeLike
Pingback: Photography for Beginners Part 10: Focal Length | Park Preview