Each post in this series builds on information discussed in previous posts. See the Photography for Beginners page on the menu for links to all the posts.
Part 4: Aperture Priority Mode
In this post I am going to discuss depth of field (DOF).
DOF is one of the most important basic aspects of photography. It’s fairly complex because depth of field constantly varies based on three primary factors and how they interact with each other.
It takes a while for all of this to sink in and it’s very easy to forget at times, or simply misjudge. (I do both all the time.) As always, studying your own photos to see what you got right and what didn’t work will teach you as much or more than reading about photography will.
.
What is in focus?
Only objects at the exact distance where your lens is focused are exactly in focus. This is your plane of focus.
Everything else in front and back of this plane is technically out of focus. But thankfully the human eye accepts more than the plane of focus to be in focus.
There is a range in front of and behind the focal plane where objects are still acceptably sharp. This range is your depth of field.
The further away objects are from where you focused the less sharp they become, until they are perceived to be out of focus. There is no abrupt dividing line between what is in focus and out of focus, it’s a gradual transition.
What this means is that you have a DOF, an acceptably in focus distance range, to work with for each image you make. How vast or tiny that range is depends on the variables discussed below.
.
Aperture
Aperture size directly affects how much DOF you have.
Large apertures (small f-stop numbers) have a shallow depth of field.
Small apertures (large f-stop numbers) have a deep or large DOF.
However, aperture size alone does not dictate what your actual DOF is. DOF is always relative. Aperture works in concert with two other variables to determine your DOF.
.
Focus Distance
The distance from the end of your lens to your plane of focus affects DOF.
If you are shooting a flower with your lens as close as it allows (different lenses have different minimum focus distances) you get a shallow DOF.
If your subject is three feet away you have a larger DOF to work with, and if your subject is more distant you get a much deeper DOF.
.
Focal Length
Without going into all the technical aspects, focal length refers to the angle of view and magnification of a specific lens. This is expressed in millimeters, like a 50mm lens. A zoom lens has a range of focal lengths in one lens, like an 18-135mm lens.
A lens with a short focal length, like 18mm, is called wide-angle because you get a large angle of view. (You’re able to capture a wide scene.) A lens with a long focal length, like 200mm, is called a telephoto or long lens. A telephoto lens has a narrow angle of view with strong magnification.
Wide-angle lenses appear to provide a deeper DOF than telephoto lenses.
The narrow field of view and magnification of a telephoto lens visually alters how a composition appears in a photograph, giving the impression of a much shallower DOF.
So focal length affects perceived DOF. It often does not affect actual DOF if you were to take out a ruler and measure, but since photos are a visual medium perception is what matters.
In practical terms this means that even if you are using a large aperture like f4, if you are also using a wide-angle lens you can still have a good-sized DOF to work with. But if you are using a telephoto lens you will often have less DOF than you might expect.
To get an extremely shallow DOF combine a large aperture with a telephoto lens close to your subject.
For the greatest DOF combine a wide-angle lens with a small aperture from a distance.
.
Halfs and Thirds
DOF is not always evenly distributed from the focal plane.
In other words, if you are focused on a subject and have a DOF of 6 feet, you don’t necessarily get 3 feet in front and 3 feet in back that is acceptably in focus. The distribution of your DOF depends on how much distance there is between you and where you focused (the focal plane).
If your subject is fairly close you get a mostly even distribution, half in front and half behind.
But if you focused on a subject farther away from you the distribution becomes uneven. A third of your DOF is in front and two-thirds behind.
Most of the time this isn’t something you need to consciously think about when taking photos. But if you come up with unexpected results at times this may be the explanation you’re looking for.
.
Image Size
The size of an image affects perceived DOF. If you post an image on the web or only print it as a typical 4 x 6 photo it will have a deeper perceived DOF. If you print an enlargement it will have a shallower perceived DOF.
You may have noticed this yourself with your own photos. A picture looks great on your tablet so you print an 8 x 10 enlargement and suddenly it doesn’t look as great. Less of the image looks sharp.
This goes back to what we discussed at the beginning, that DOF is a range with a gradual transition from sharp to unsharp. By enlarging the image your eyes are able to detect more blur, blur that could not be detected at a very small size.
The same thing goes for blur from things like slightly missed focus or too slow of a shutter speed. When you print an enlargement you are also enlarging any flaws an image may have, so they are more easily noticed.
If you are planning to print enlargements to hang on your wall or give as gifts you need to be a lot more aware of getting DOF right for your subject while you are shooting.
.
Zone Focusing and Hyperfocal Distance
For the sake of completeness I am mentioning this, but it isn’t a must learn thing, especially for beginners.
Zone focusing is focusing not on a specific subject in your composition, but instead setting your focal plane at a chosen distance in order to create a zone of focus to make the most of your DOF.
This is sometimes done in landscape photography when you have more than one important object in the composition, they are at different distances, and you want them all as sharp as possible. You focus to cover that zone rather than one subject.
Zone focusing can also be useful in street photography. Street photography is all about capturing a moment. When the right moment comes you have to be fast and having to focus might mean missing the shot. If you manually focus ahead of time to cover the zone where your subject is likely to appear you’re set for when the moment arrives.
Hyperfocal distance is a type of zone focusing that has infinity as the end point of your DOF. Hyperfocal distance is used sometimes in landscape photography because it’s the only way to get the maximum DOF possible in a single shot.
Using the hyperfocal distance is tricky because getting it right depends on measurements and most of us don’t walk around with a tape measure. Most photographers estimate the distance by eyeballing it. But if the estimate is off and you focus too close you lose infinity focus and distant objects will be soft.
If your camera has the focus peaking feature you can use it to get an idea of what your zone is. While zone focusing has it’s uses, just selecting an appropriate aperture often takes care of things naturally.
If you want to learn more about how zone focusing and hyperfocal distance work, read one of the many articles on the web or watch YouTube videos.
.
Subject Isolation
Two things help with visually isolating your subject from potential distractions in an image. They are depth of field and distance.
Subject isolation isn’t always desirable, but when used creatively at the appropriate time it can greatly enhance an image.
Using a DOF that is only enough needed to make sure the critical part of your image is sharp will cause the surroundings to be somewhat to very out of focus.
The more distance there is between your subject and other objects also helps with isolation.
When possible, shoot from an angle that doesn’t include nearby objects in the background.
It’s easier when photographing people. If they are against a wall have them step away from it to create space. If they are somewhere in the open move around so you can set up your shot where there are no objects behind them for several feet.
Sometimes it’s desirable to have a heavily blurred background behind your subject so background clutter doesn’t distract. That blur is called bokeh, as discussed in the Aperture Priority Mode post.
Several things help with getting good bokeh, including using a shallow DOF. (Use a large aperture and/or a longer lens.)
The more distance there is between where your depth of field ends and objects in the background start the better bokeh will be.
To be clear, bokeh is not part of DOF. The whole point is that it is outside your DOF. You are using shallow DOF to aid in creating bokeh.
All of this also applies to foreground objects that are outside of your depth of field. With the right DOF you can even make things like annoying twigs seem to almost disappear.
.
That’s a lot of info. Now what?
By now you realize your actual and perceived DOF in any given situation is controlled by a combination of factors. These factors are used to counterbalance each other to find a good compromise or stacked to get extremes.
The DOF contributors can be difficult to remember every single time you snap a photo and you will forget to account for at least one of them many times.
Think: aperture, distance, focal length.
Everything else we discussed in this post are simply details related to those three things.
There are many DOF calculators available on websites or for download to your phone or tablet, but I don’t find them very useful. Unless you’re set up on a tripod and have a measuring tape with you, knowing precise measurements doesn’t help much when you’re eyeballing a potential composition.
As a beginner it’s better to pay attention to what’s in focus in the live view on your camera and think in broad terms.
Will a shallow DOF be most impactful in this instance? Do I want as much in focus as possible? What should I change on my camera or in where I shoot from to get that DOF?
Take multiple photos. Experiment.
Experience is your best tool for creating good photos in general and understanding DOF in particular. So just keep at it. The more you take pictures the more it will become second nature. (I’m not there yet myself, but I’m working on it!)
In the meantime, even when you mess up, you still sometimes end up with a happy accident. A photo that isn’t what you originally intended, but you end up liking it anyway.
.
Examples
(Click on the photos to see them in higher resolution for better detail.)
Photo #1 is an example of me not even thinking about DOF, to the detriment of the image. I’d just come home from a park, saw the leaf caught in the fence, grabbed my camera from its bag, and snapped the pic.
My aperture was at f8 from the park. If I had slowed down to think about what I was doing I would have realized that a super shallow DOF would have turned this into a much nicer photo by better isolating the leaf and fence from the cluttered background.
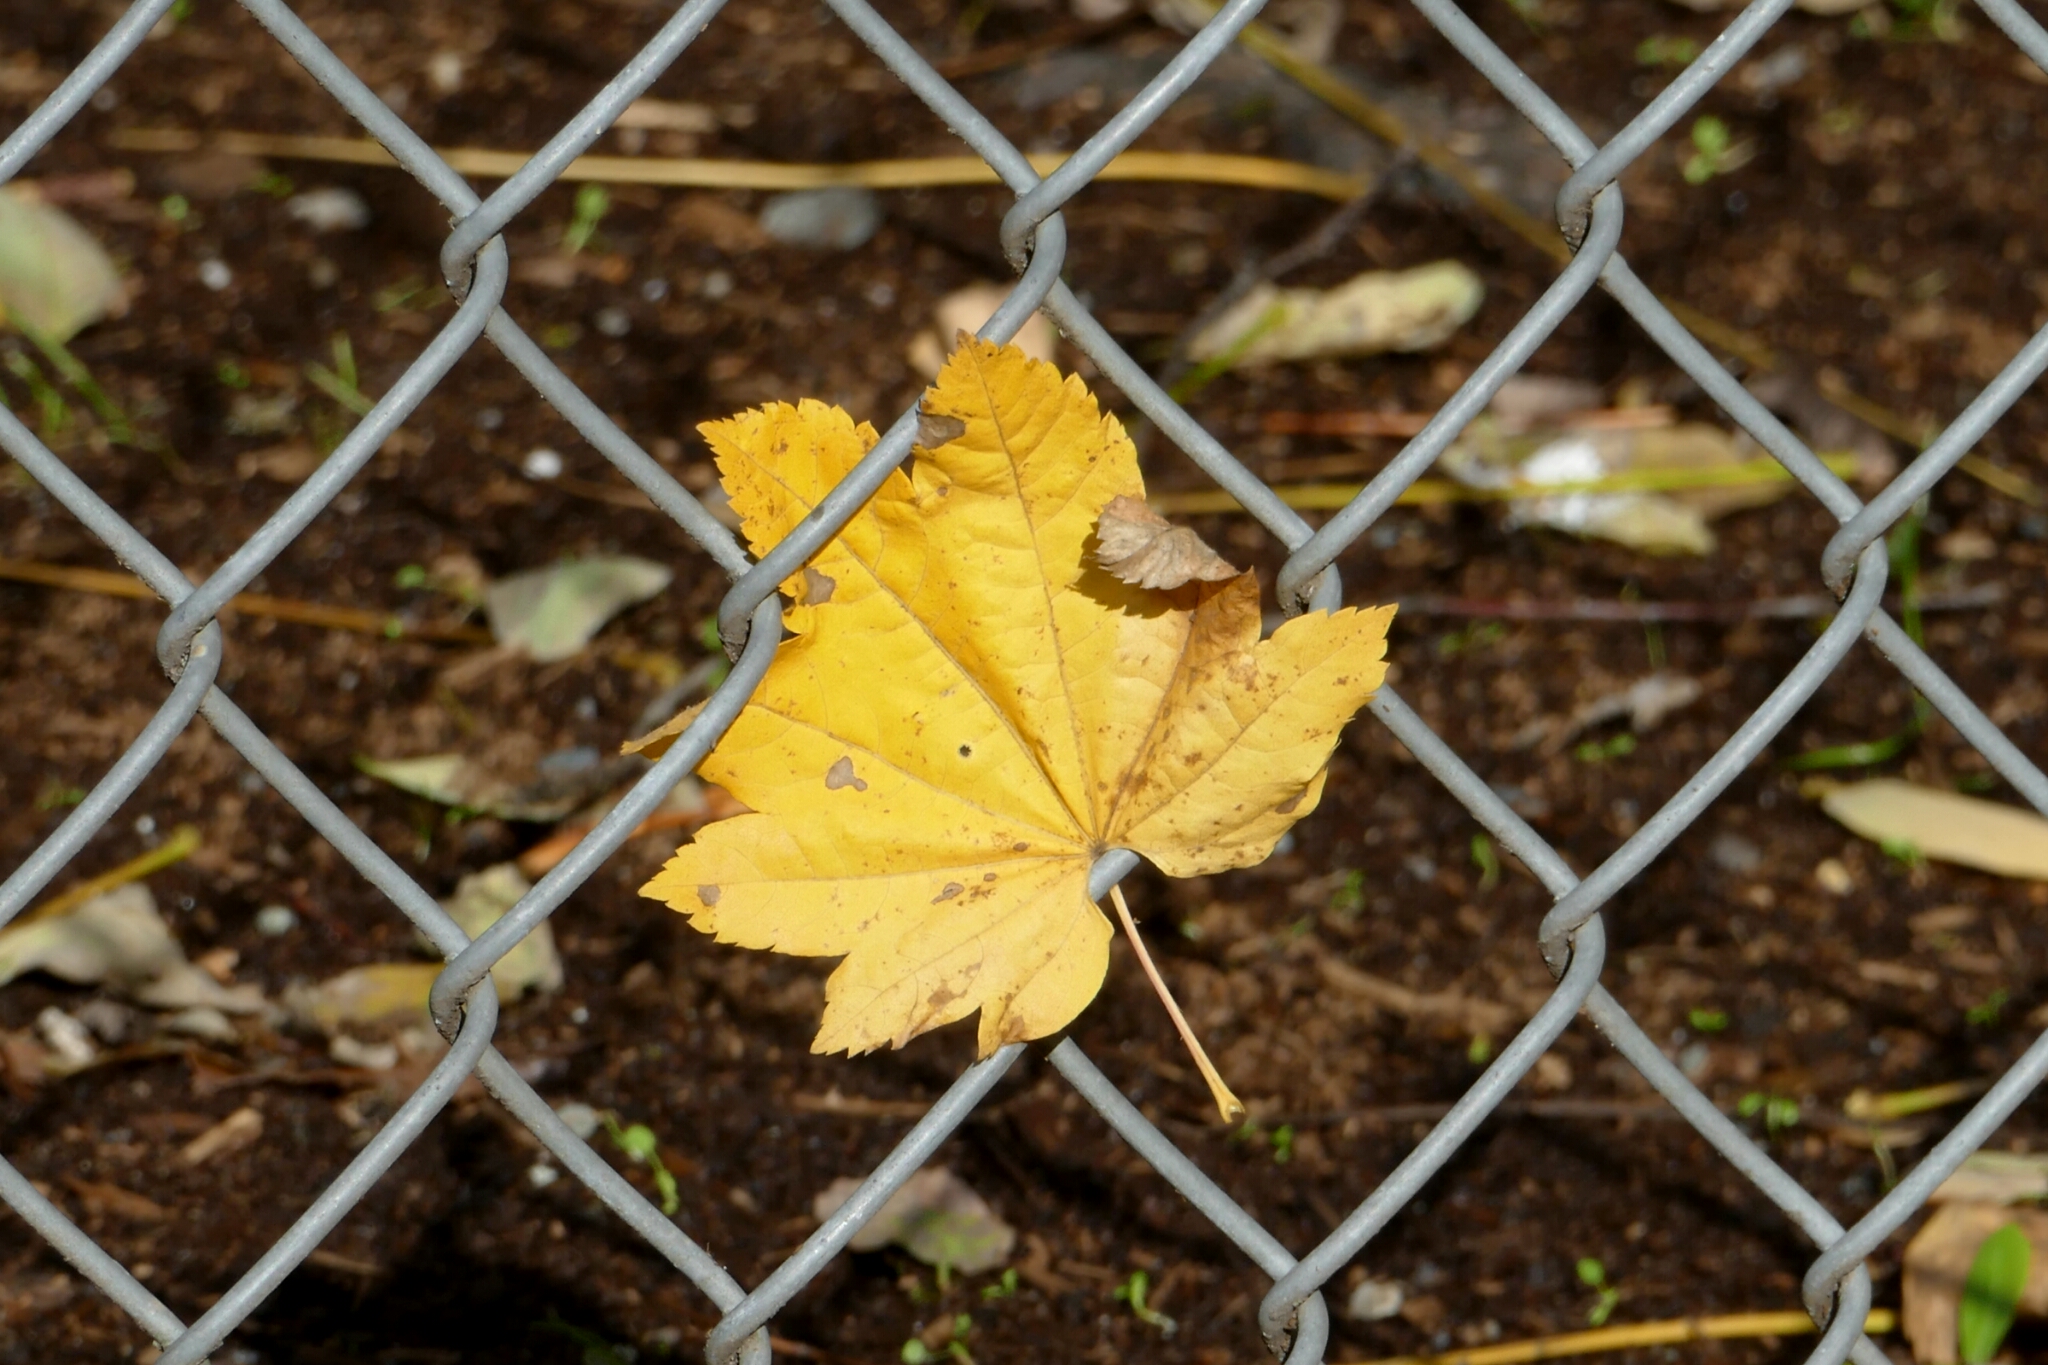
Photo #1.
Photos #2 and #3 show the difference aperture makes in the same composition. My camera was on a tripod using my telephoto zoom lens at 300mm. I manually focused on the mountain.
In photo #2 I used Aperture Priority Mode with a setting of f16. Everything that should be in focus is because I had enough DOF.
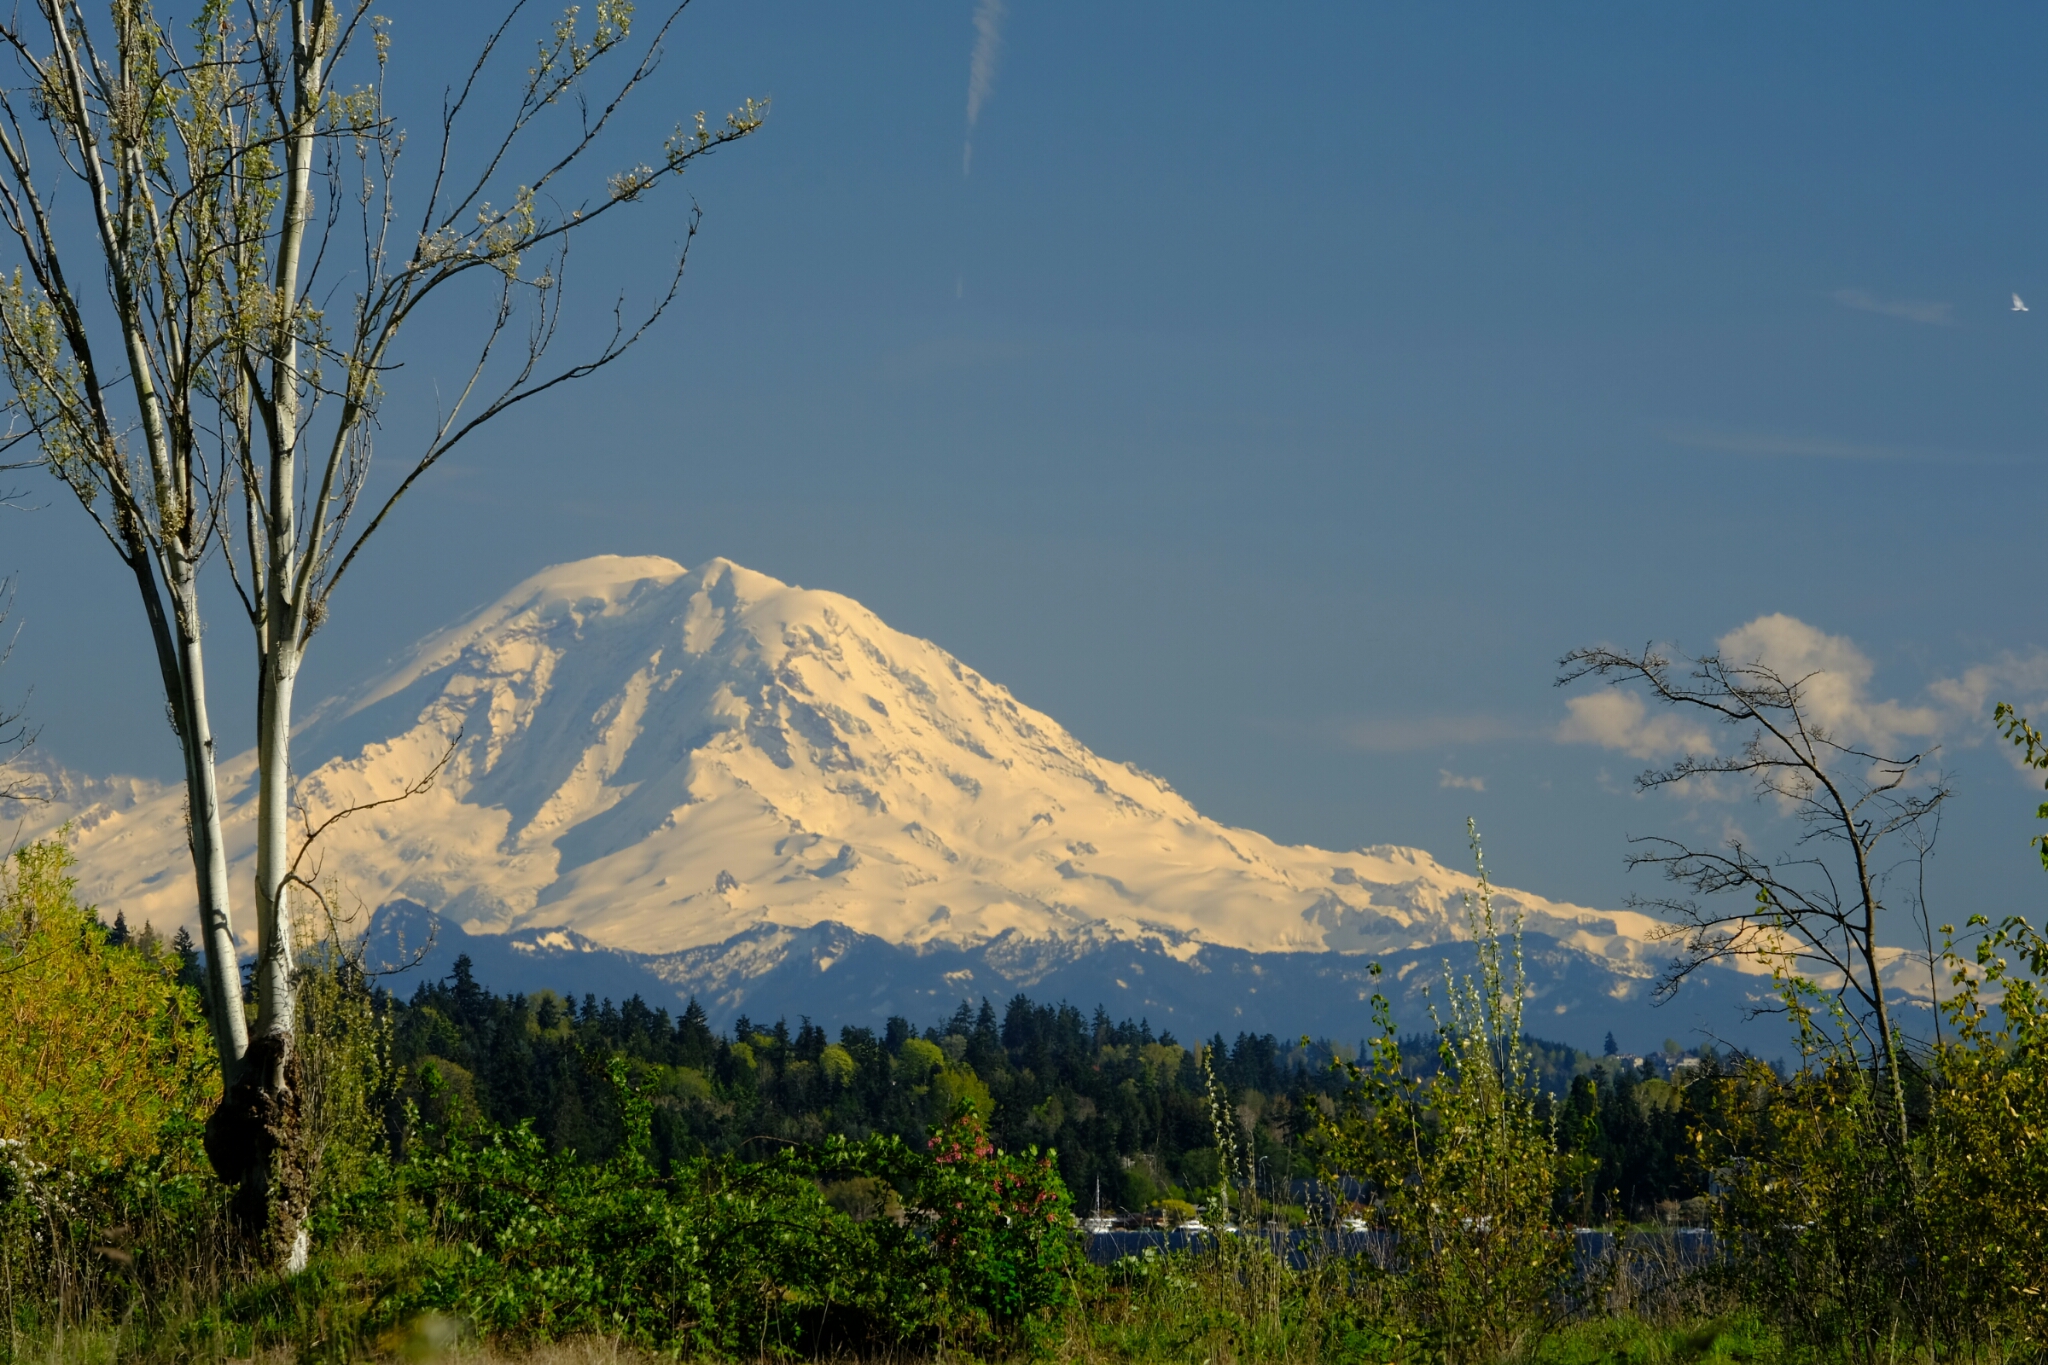
Photo #2.
In photo #3 I switched the camera to Auto Mode using the landscape scene option because I was curious what choices the camera would make for the same situation. (You never know, sometimes the camera is smarter than you are.) Surprisingly, the camera used f8, which is an odd choice for a landscape on a lens that goes to f22.
You can see that the tree on the left is slightly soft (not completely in focus). Even though I had distance working for me because I was shooting across a field, f8 didn’t quite provide enough DOF because I was focused on the mountain (infinity) and using a telephoto.
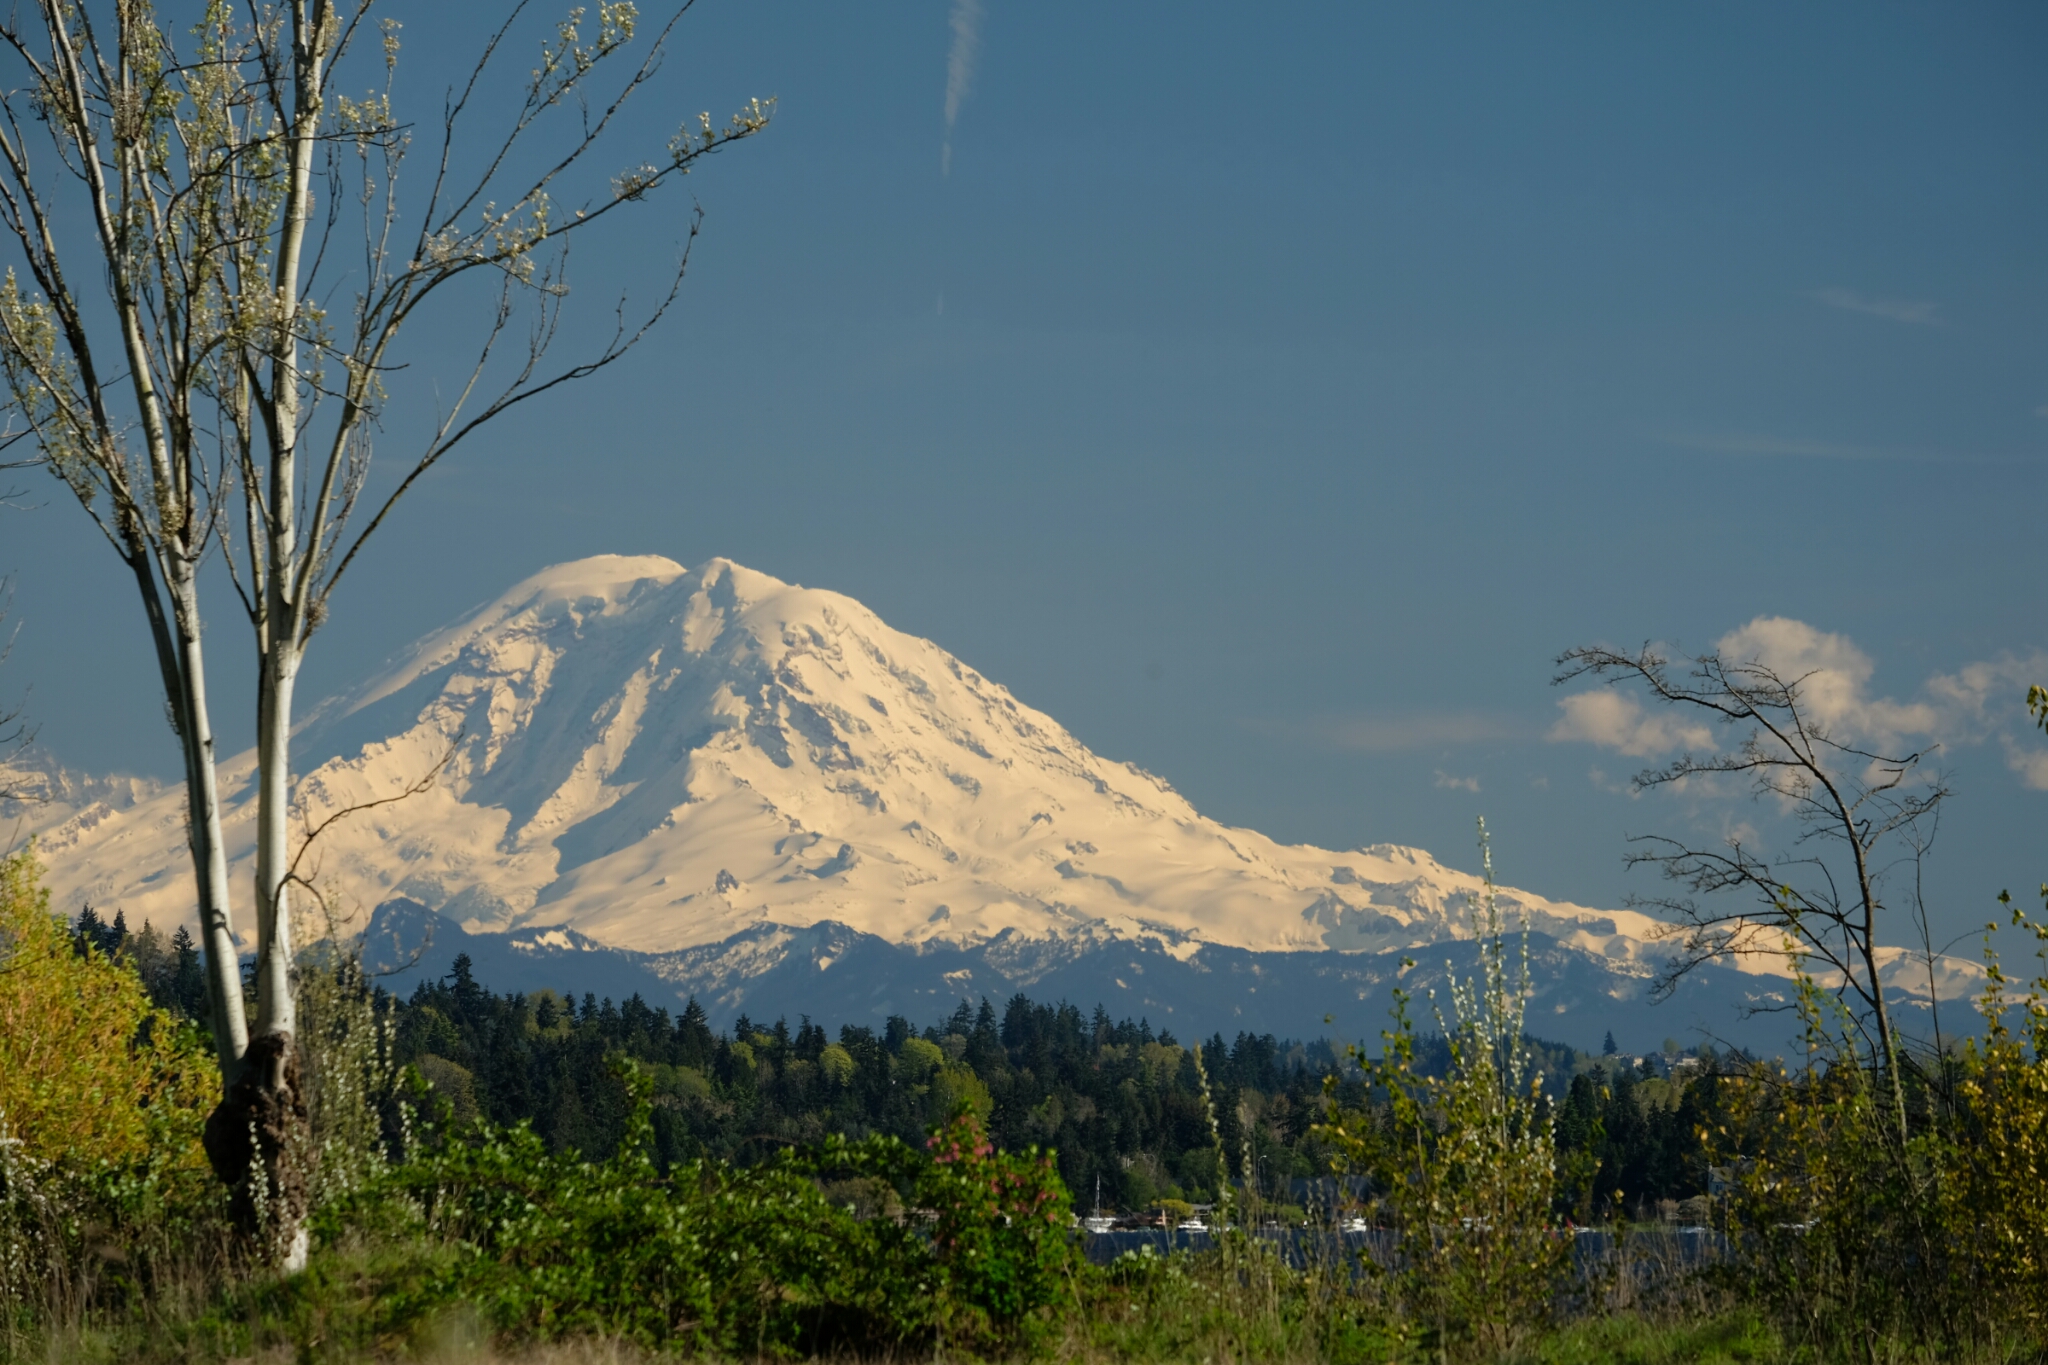
Photo #3.
Photo #4 shows how combing a wide aperture, short distance, and a longer focal length provides a very shallow DOF. I was sitting, so my foot was close, f4, 83mm. Only the top of my shoe is in focus. The shoe sole and pant leg are out of focus.
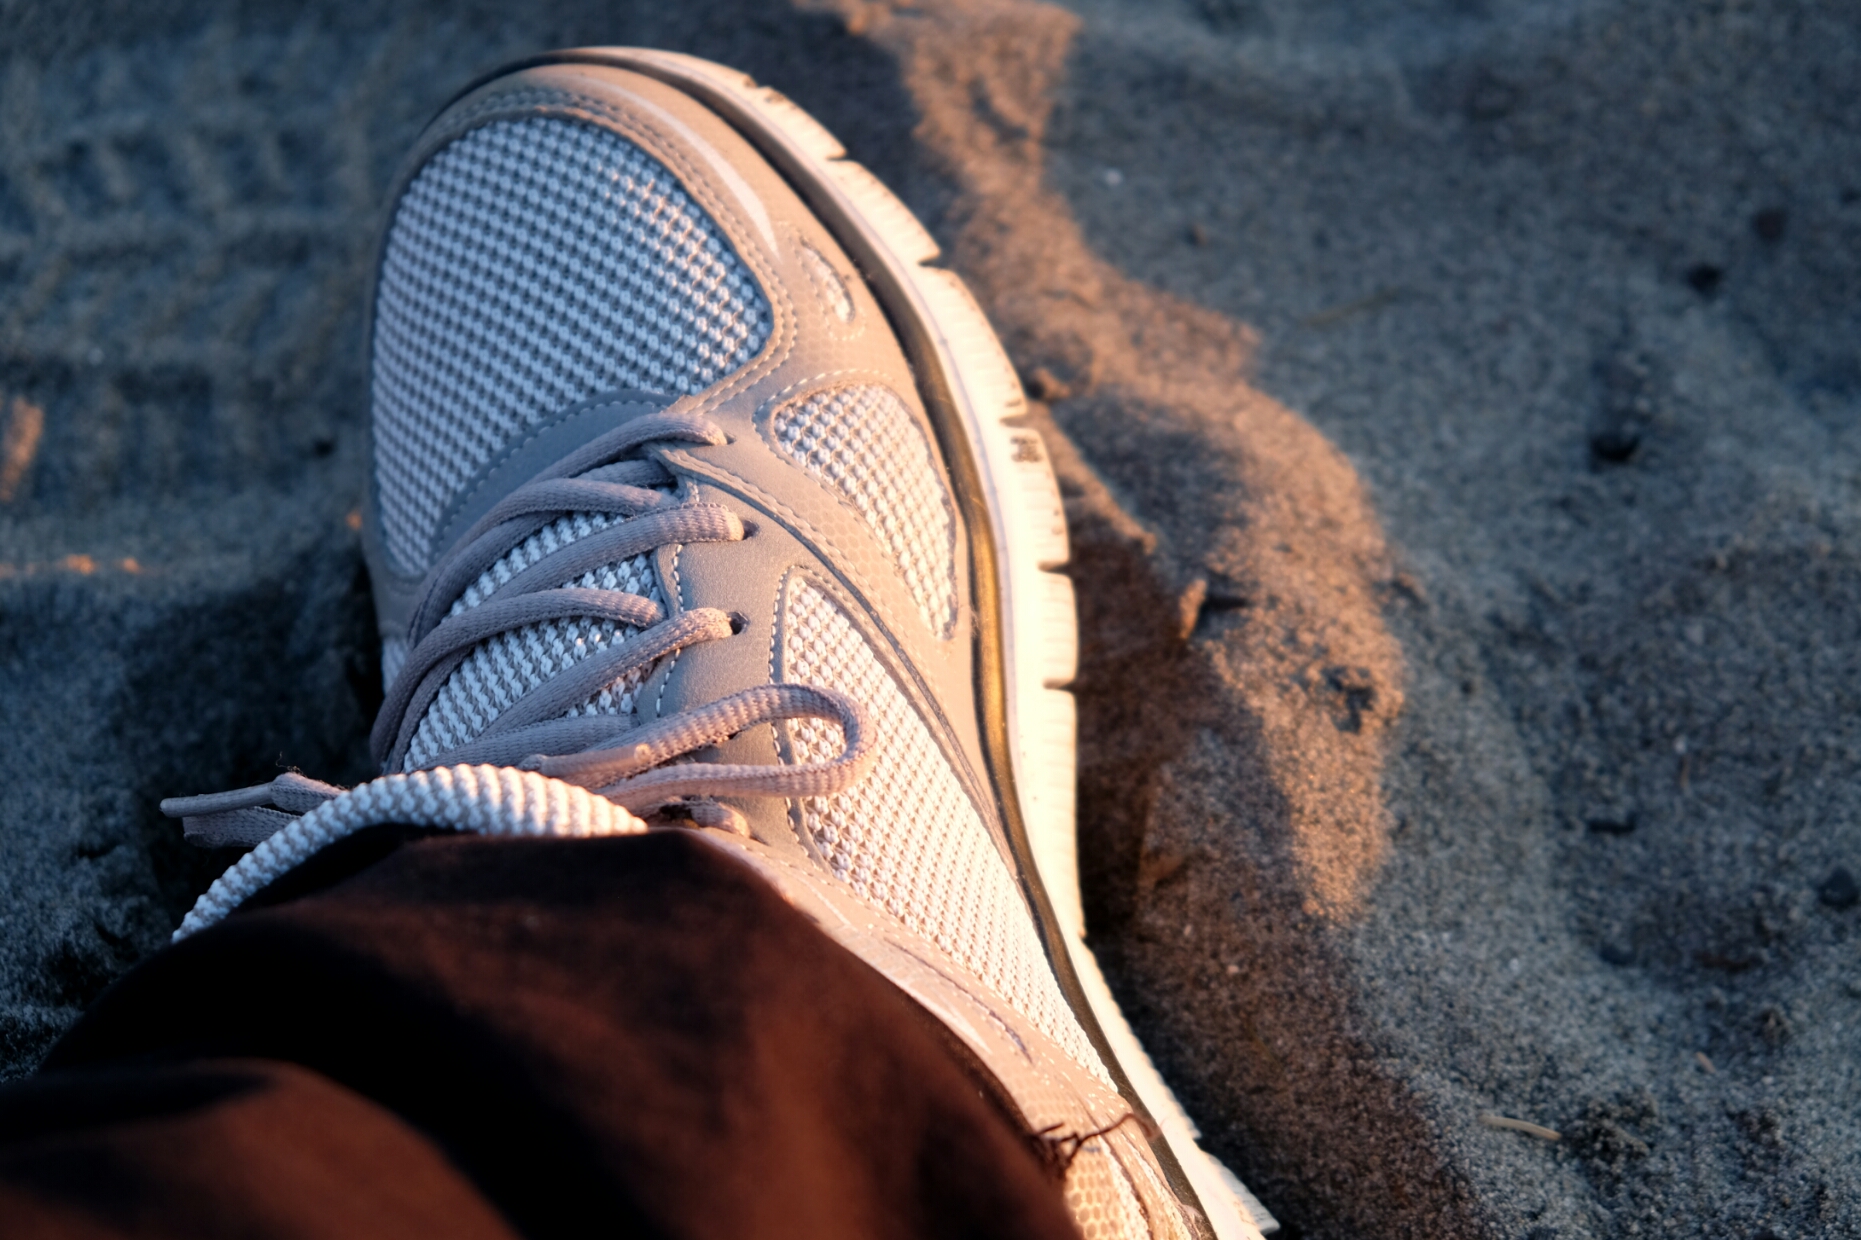
Photo #4.
Photo #5 is an example of getting everything right. Aperture was f4 with my zoom lens at 400mm. But I had enough distance between me and the flower to provide enough DOF so most of the flower is in focus. The combination of f4, long focal length, and shooting at an angle with no objects in the immediate background made for very nice bokeh.
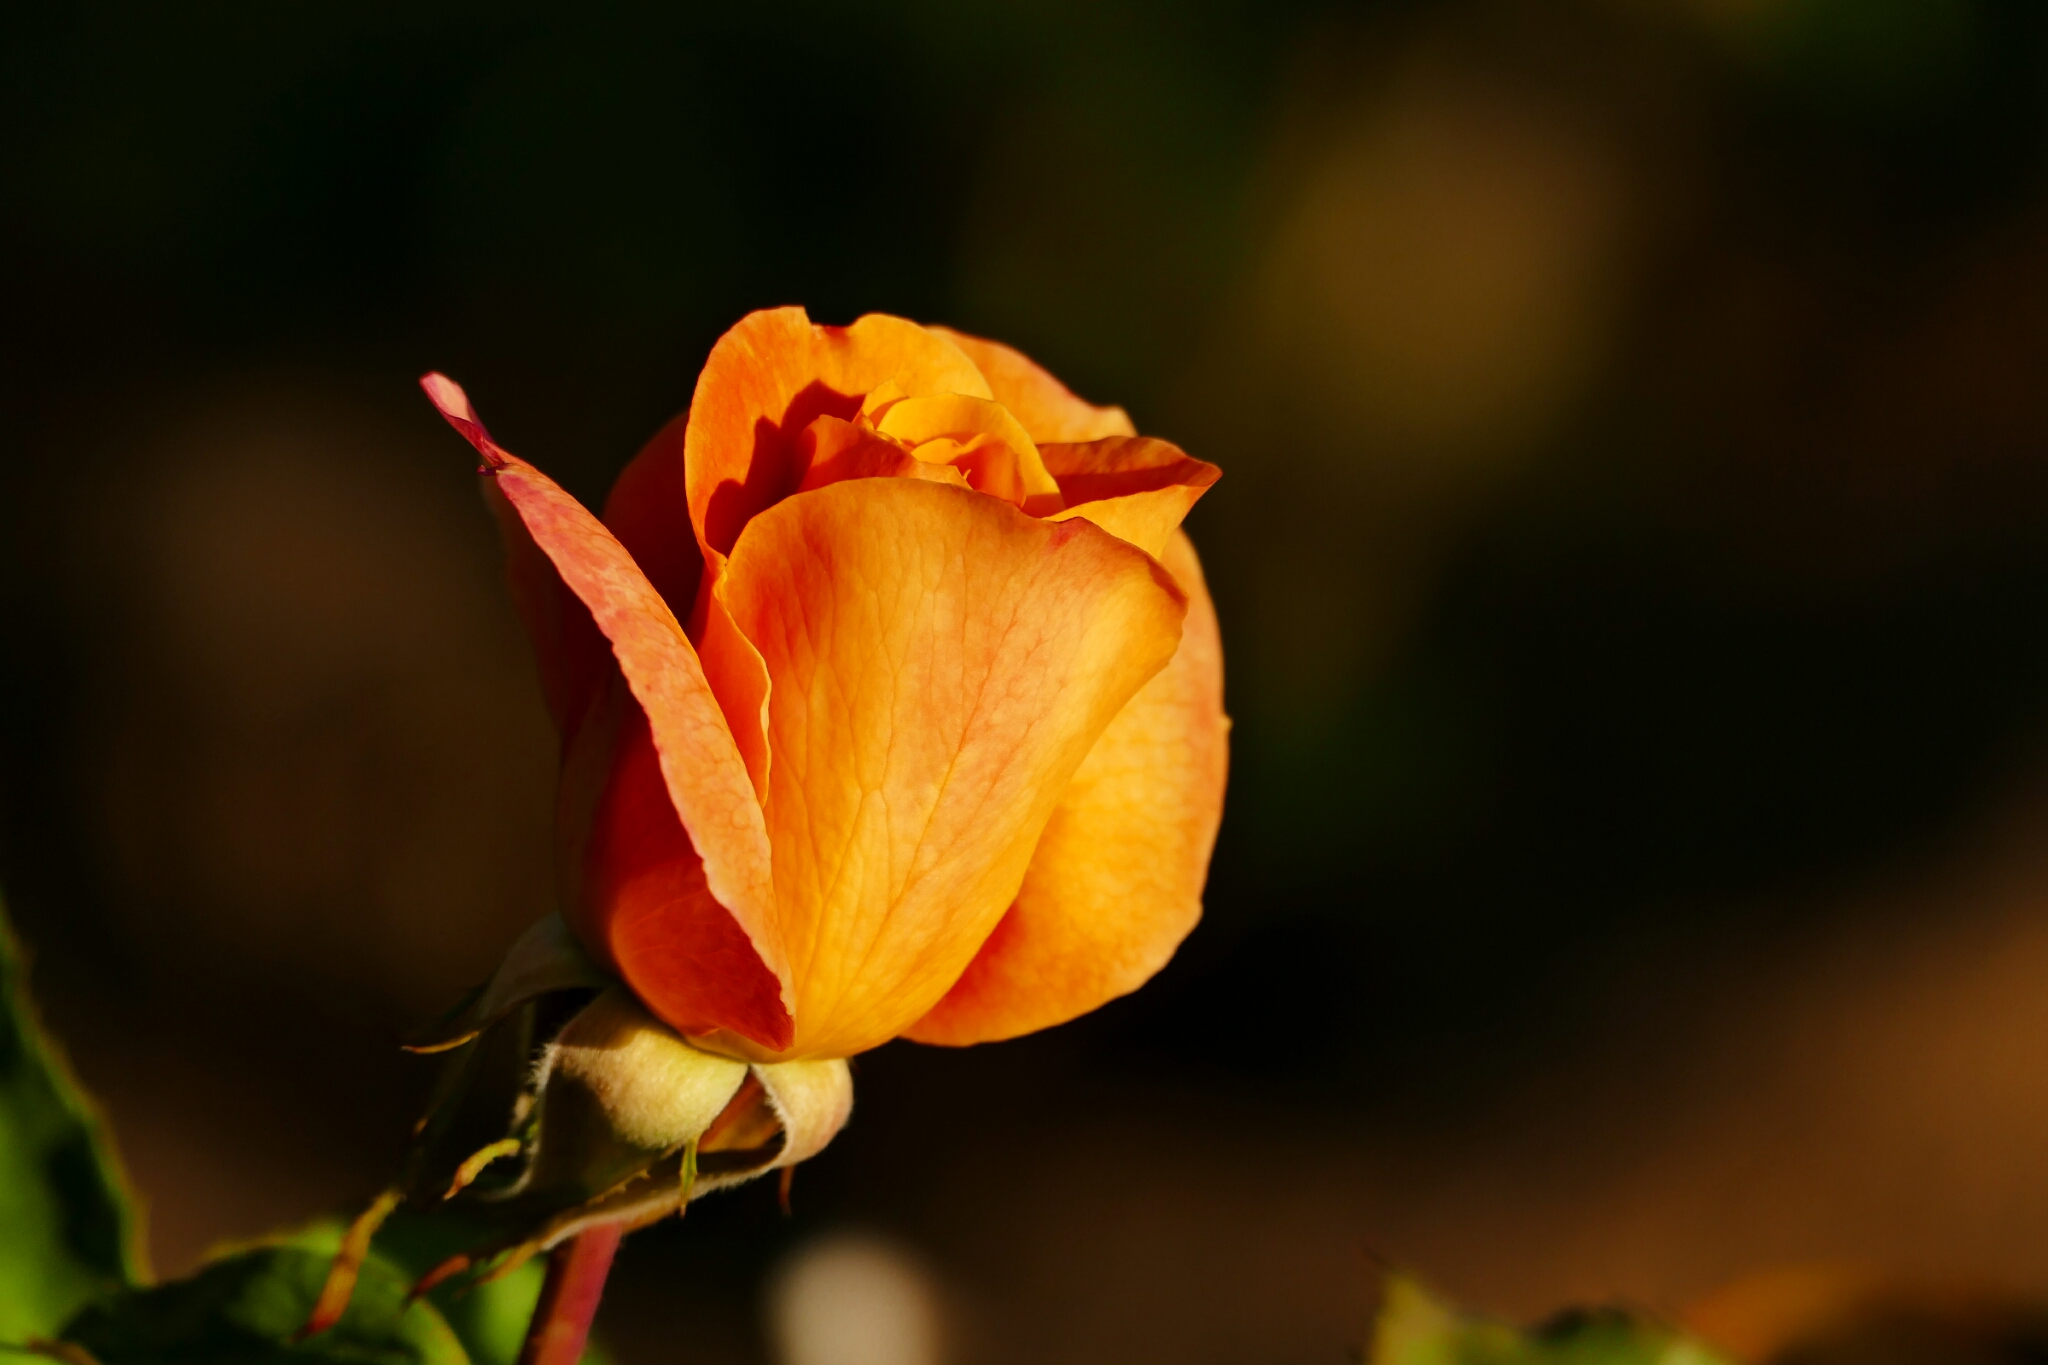
Photo #5.
Photo #6 shows how bokeh can also work on foreground elements. The light was dim and the heron was way back in the bushes, with a lot of leafy twigs in between us. I used f4 to get enough light and I zoomed in to 400mm to focus on the heron.
Since I was using a large aperture and my focal plane was quite a distance away from me, the leaves near me turned into indistinct green blobs because they were well outside the DOF. While still preventing a clear view, they are much less distracting due to the smooth bokeh.
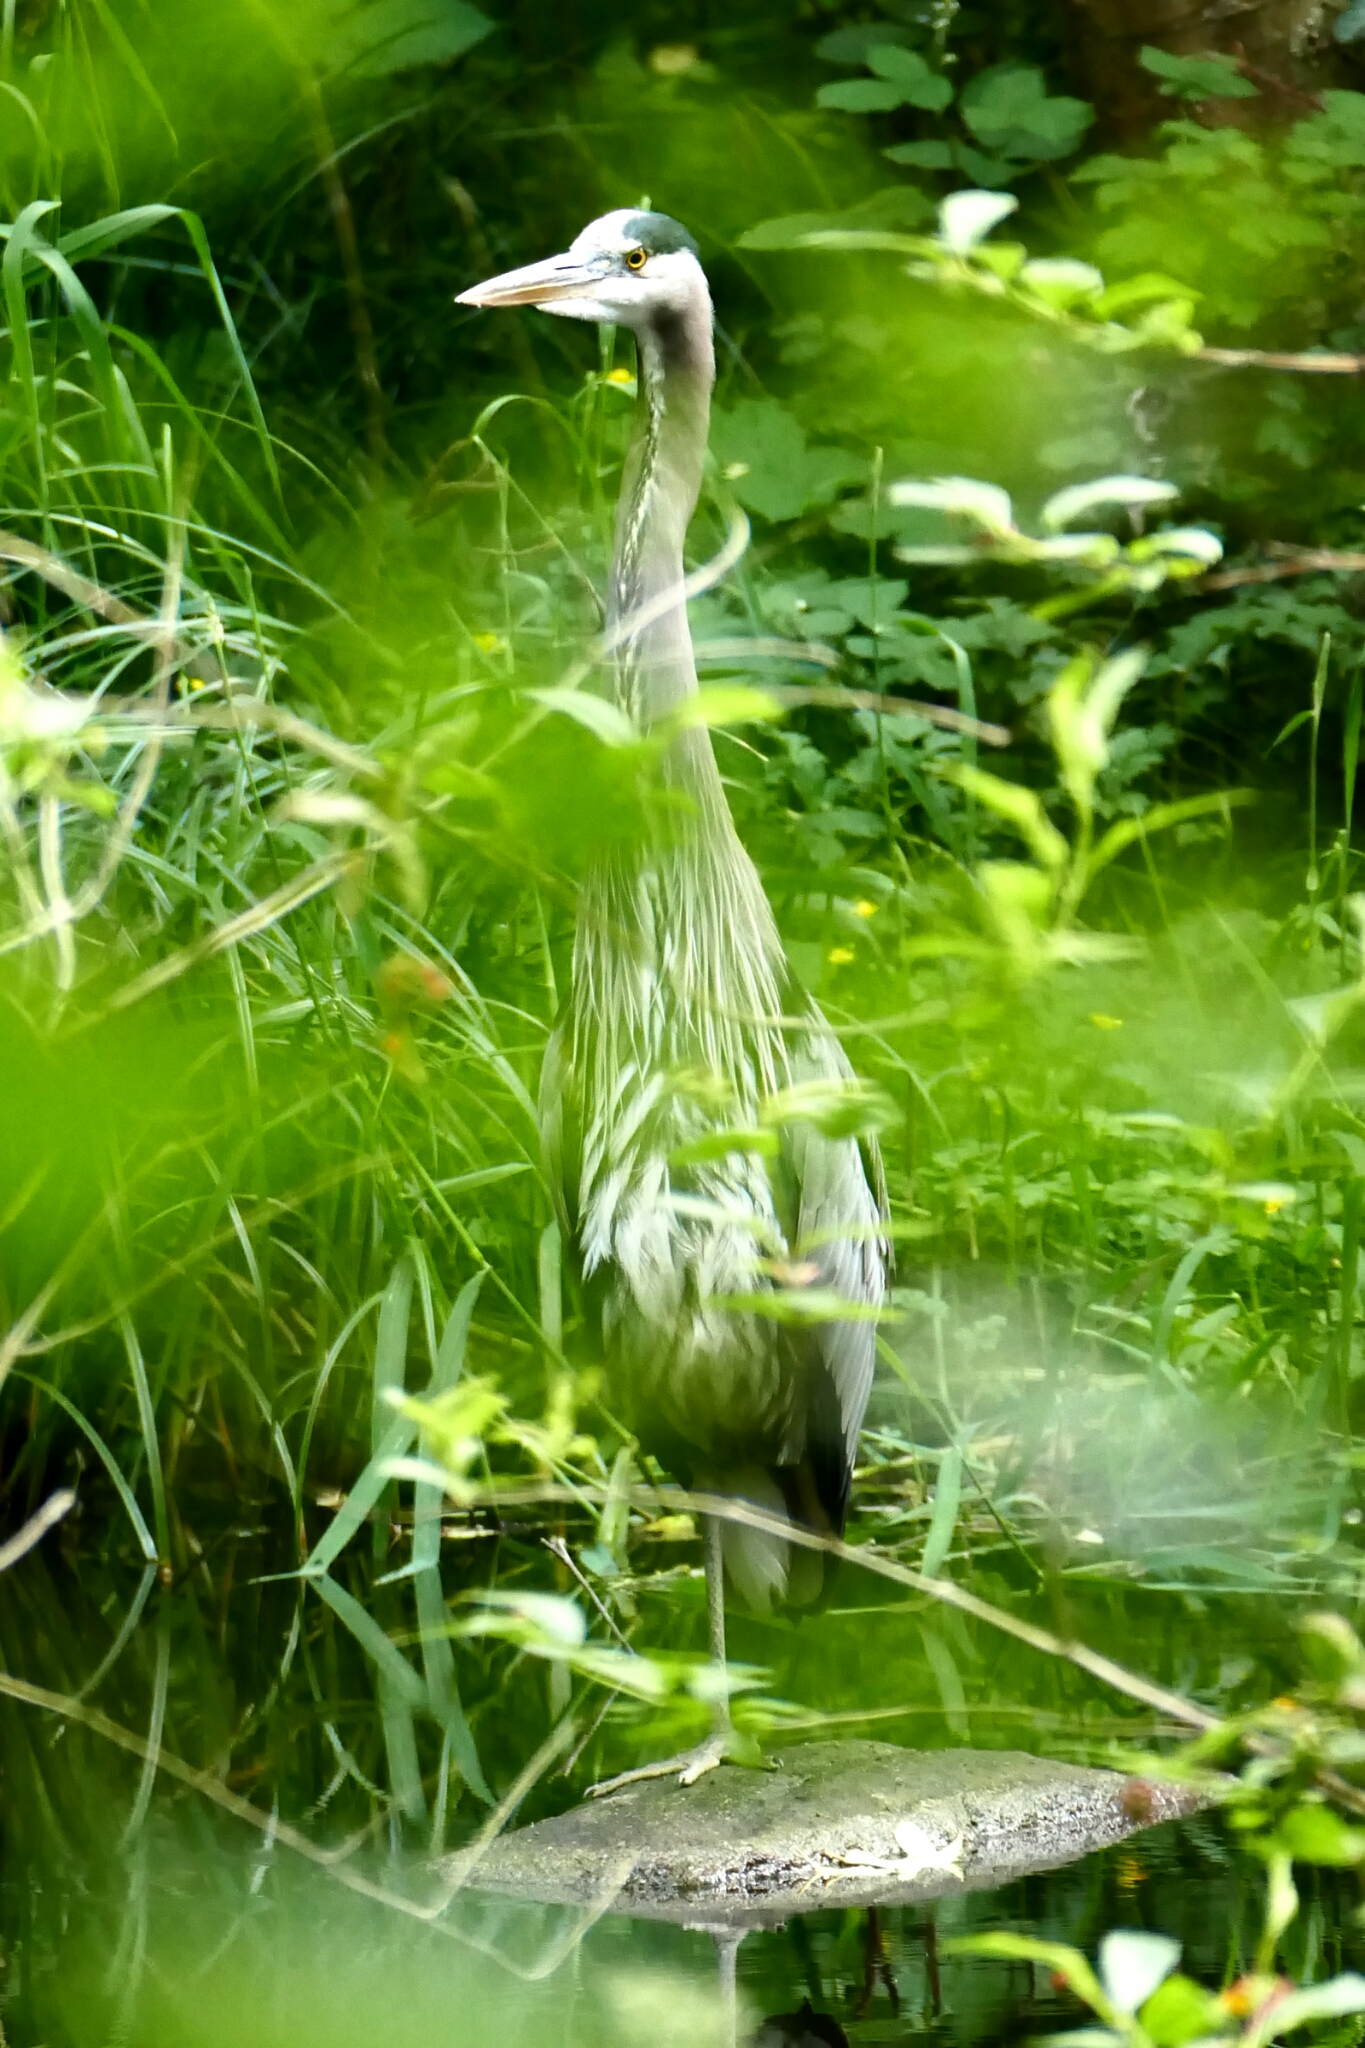
Photo #6.

I’m so impressed with the content on this blog. I can’t wait to dig in and and maybe take better pictures.
LikeLike
Thanks, Ruth. 🙂
LikeLike
Thank you for doing the beginners section. There is no way I want to re-invent this wheel, so I may just share this gem of a section on my site.
LikeLike
Feel free as long as it’s a link! 🙂
LikeLike
Pingback: POTW #2 Results – latenyte photography